Are you a newbie to Git/Github?
Don't know where to get started?
Get bored with Youtube videos and want to gain some practical experience in Git/Github?
Then, you are in the right place.
Here, we cover the basics of how to push your 1st repository - how to deal with problems while working in Git.
Don't worry, if these terms are new to you. We are going to cover each object.
Prerequisite Things :
- Git must be installed in your device. You can download it from here.
- You should have an IDE installed in your computer (Preferred VS Code). Download from here.
- You must have an account on Git. Make it now.
While signing up, you can give your school/college issued email to take the student benefits.
What is Git/Github?
Git is a tool/version control system that lets you manage and keep the track of your source code history.
Whereas,
GitHub is a cloud-based hosting service that lets you manage Git repositories.
Why only Github??
Because it provides you a common platform where people from all around the world connect and work on the same repo/project which was not possible in the past. Earlier, a number of developers can only connect with each other and conversation related to any change are carried out through emails which consume too much of time and work for a single small change.
Because many projects were run by small organisations, it generally wasn’t worth to review, respond, and merge all the small changes.
Then what comes in image??
Git/Github, which brings a great revolution in the open source contribution.
Frequently used Terms :
Repository - It's just a file location where you are storing all the files related to your project.
Push/Pull - Refers to inserting/extracting the code from the Github.
- Commit - It is used to record the changes in the repository.
- Branch - It is a pointer to a snapshot of your changes/commits.
- Checkout - It is used to switch between branches in a repository.
- Rebase - It refers to the process of moving or combining a sequence of commits to a new base commit.
- Clone - It is used to make a copy of the target repository or clone it.
- Remote - It is used to store same/remote repository somewhere else on the internet.
Note : Repository is commonly known as Repo.
How to get started with your 1st Repo :
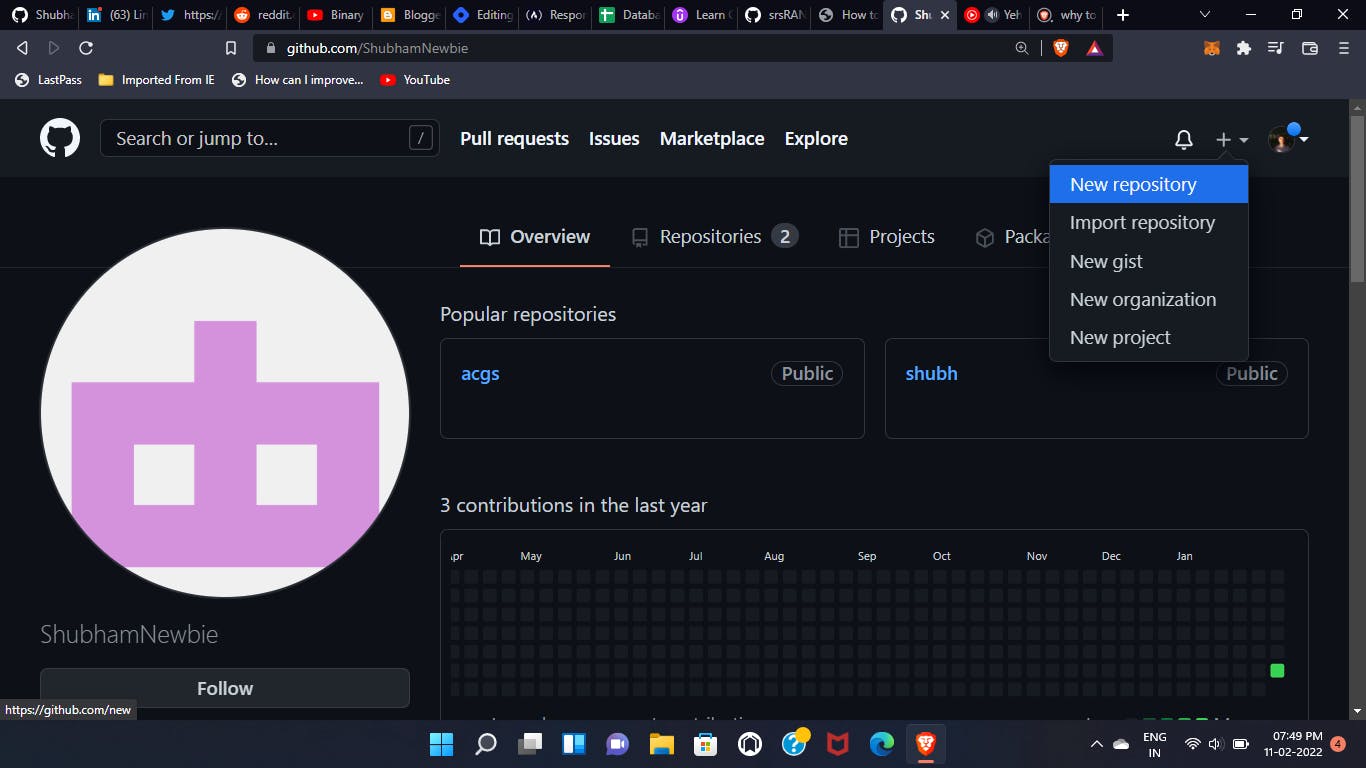
On the 1st page of your github account, you have to click on the plus icon present at the right top corner of the page to create a new repository.
 Then, write the repository name whatever you want, I named it MyFirstRepo.
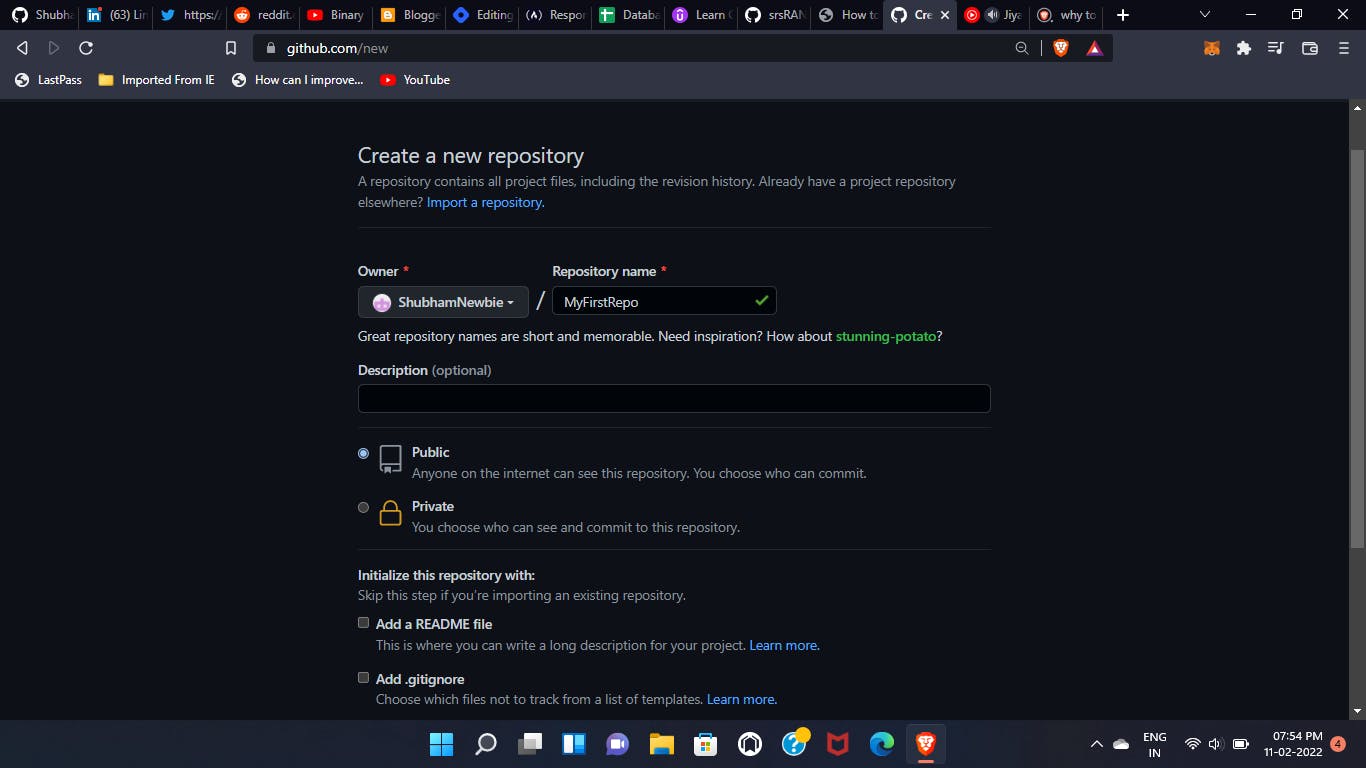 Make the repo visibility either public or private.
Readme option provide an area where you can write what the project is about and also add related information that needs to be shown to an unknown user who look at your repo.
Gitignore is a file where you can add file names which are present in your module but of no use or don't want to show to others.
Licensing provides you the legal rights of your repo and also ensure that what others can and can't do with your code.
For now, leave these readme, gitignore and license part, blank.
Now create the repo!!
You are taken to a page where a number of git commands are shown for pushing your local repo to the Github.
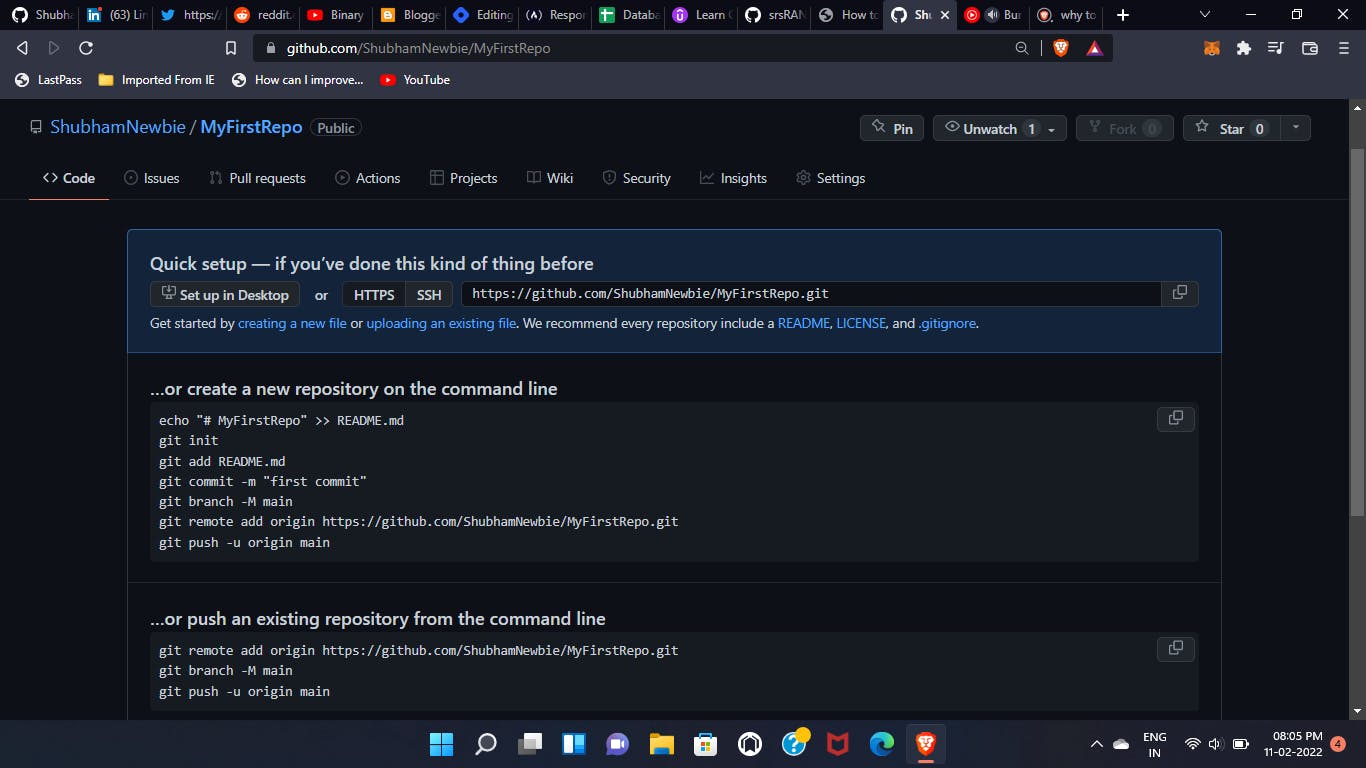
What if you add readme file at the starting point!?
You are not directed to this page, it presumed that you are a frequent user of github and know the commands to push your repo.
These commands help you to set your first repo to your github account.
echo "# MyFirstRepo" >> README.md
// This command let you add the string in the inverted commas into your readme file
git init
// Initialise a git repository
git add README.md
// Create a Readme file for your repository
git commit -m "first commit"
// It is used to move files from the staging area to a commit. This command is run after git add, which is used to add files to the staging area.
git branch -M main
// This command help you to set the branch name for the repo. By default, the active branch is main.
git remote add origin https://github.com/ShubhamNewbie/MyFirstRepo.git
// Locate where to push your code in the Github.
git push -u origin main
// Finally, push your code to the Github.
If you don't know how to push your code, you can refer these syntaxes and paste them directly in your Git bash.
Now, I am going to show you how you can proceed.
Open your file where your source code is present.
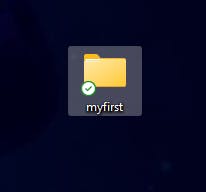
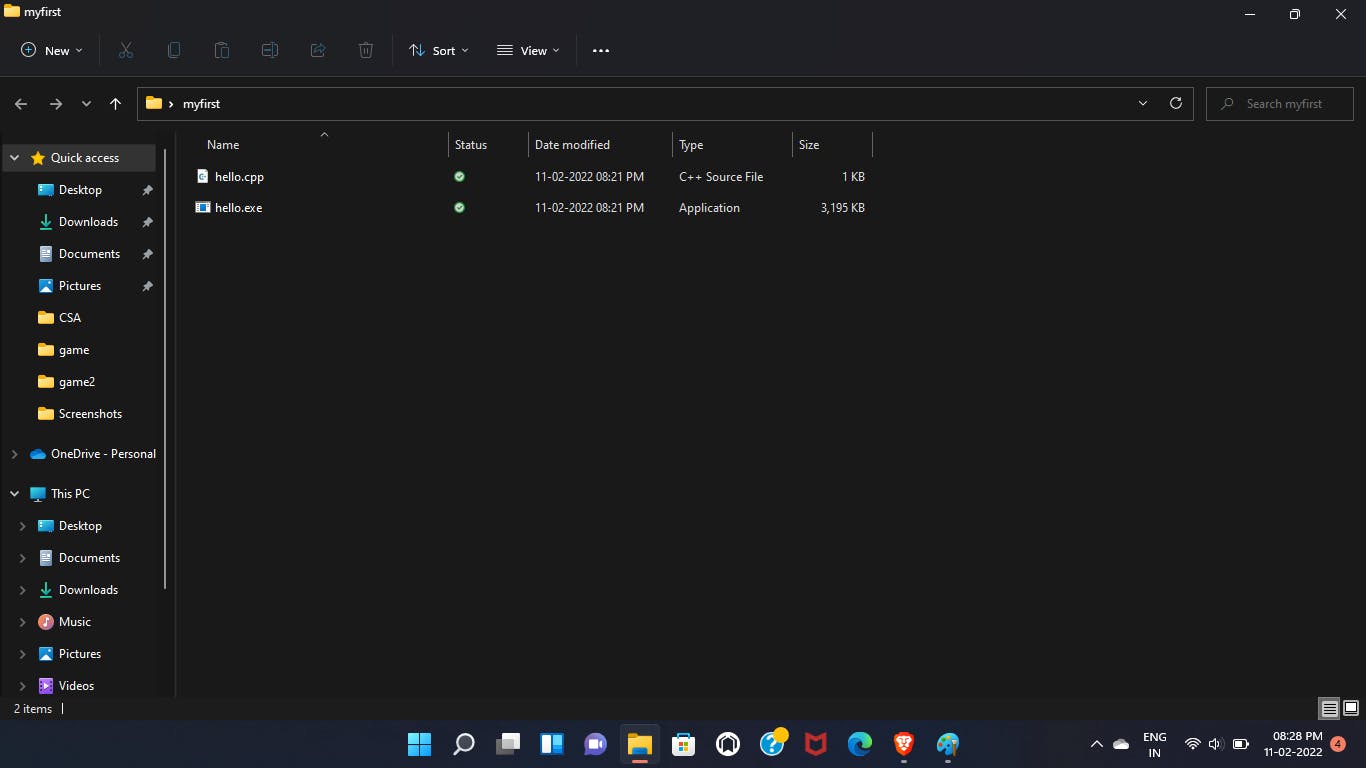 Now, right click on any area to open the option box. If you have installed Git in your system then Git bash and Git GUI options are available to you.
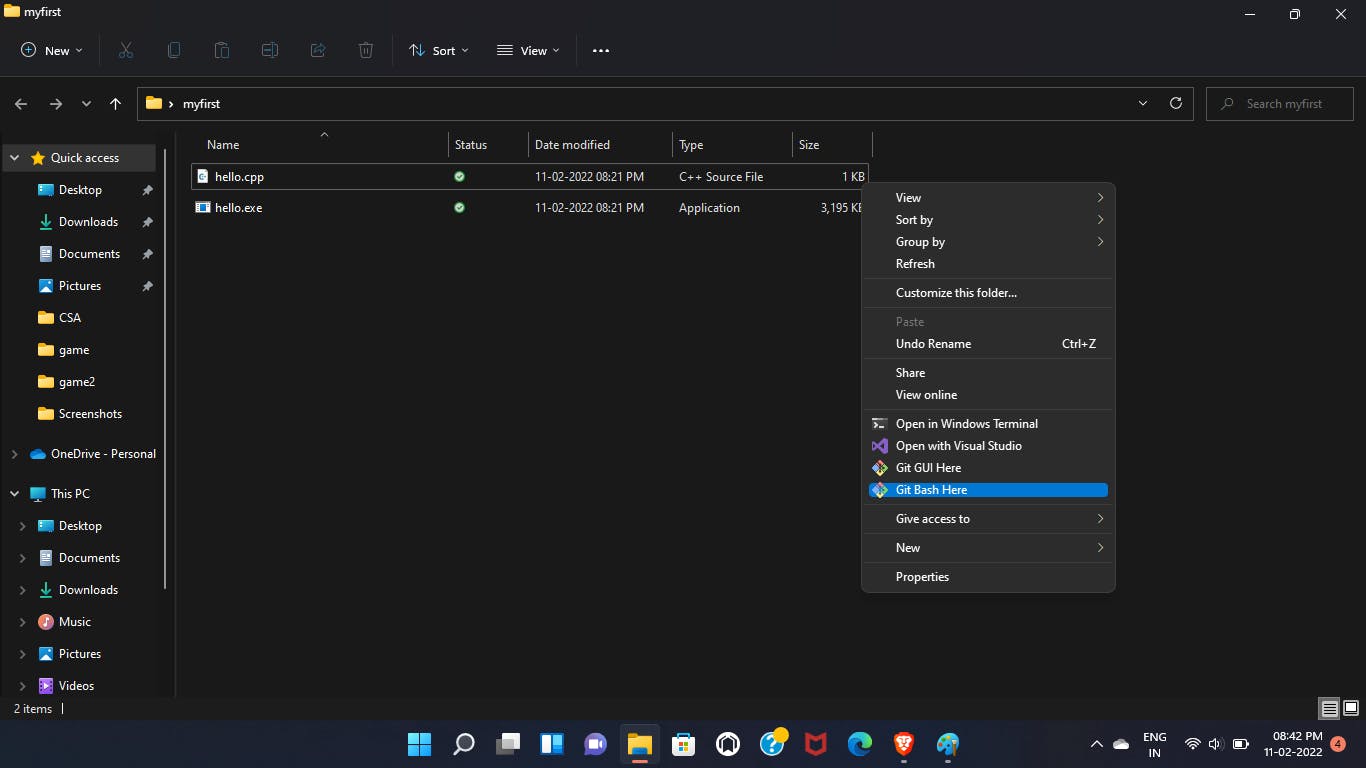
Don't use Git GUI, if you are using Git for the first time. Just click on the Git bash option to open the terminal.
What is Git bash??
Git Bash is a terminal, provided by Git to run the git commands for your code.
Why not use Git GUI?
Because if you working for the first time, then it is a good practice to work with git commands and understand the flow of code. Else, you can use Git GUI, according to your preferences.
Apart from that, Git GUI offers few Git functions which can be a dark side whereas working manually with Git commands offers you a lot of options.
Note : You can also push your remote repo through IDE(VS Code).
But still I prefer you to run commands through Git bash because it provides you a Linux environment.
What does this mean?
Most of the Linux commands are functionable in Git bash which can be a positive side for developers who want to work in Linux terminal.
Open the Git Bash and write the following commands to push your code :
The first thing is, to add your user name and email address because every git commit uses this information.
 git config --global user.name "<your name>"
// To add a user name.
 git config --global user.email <your email id>
// To add a user email.
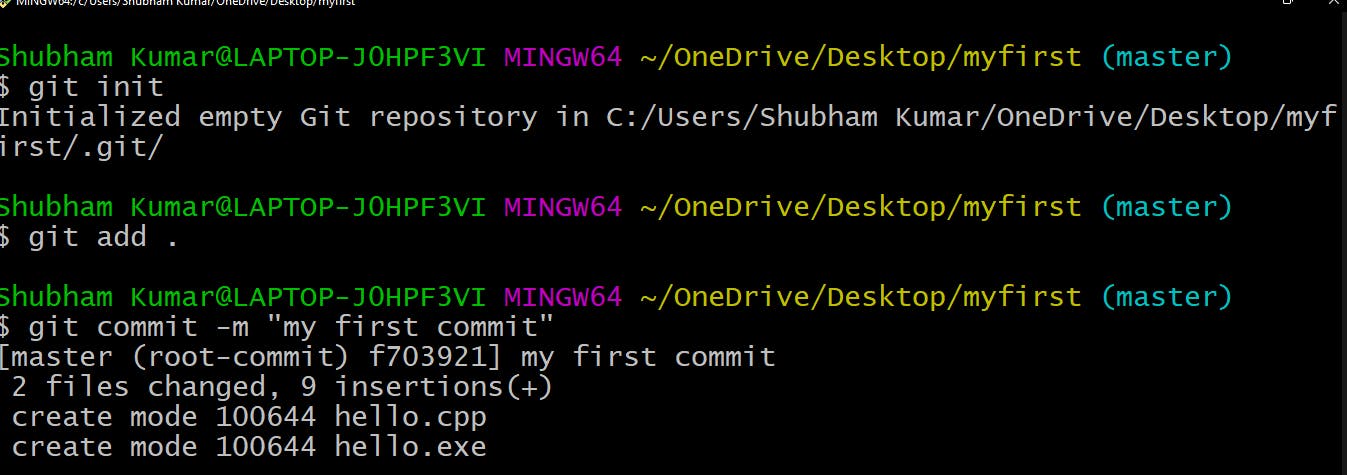
git init
 // To initialise a repo
// Files are now in unstaging area
To add all the files in the staging area.
git add .
git commit -m "my first commit"
/* To add files in the commit zone.*/
Note : -m stands for message and you can write anything inside the inverted commas If you commit without using the -m option, git will open your default text editor with a new file, which will include a commented-out list of all the files/changes that are staged in the commit. You then write your detailed commit message and the commit will be performed when you save/close the file.
git remote add origin <url>
// This command connect your local repo to the Github.
git push -u origin main
// Push your code to the main branch of your repository
// Keep this in mind, branch name may be change for your repo

In this case, I have set the branch as master.
Note : Once you push your repo and add some changes second time, then you have to just write git push command instead of writing the whole syntax to push your changes into the repo.
Now, refresh your Github page and you will see the files are added in your repository.
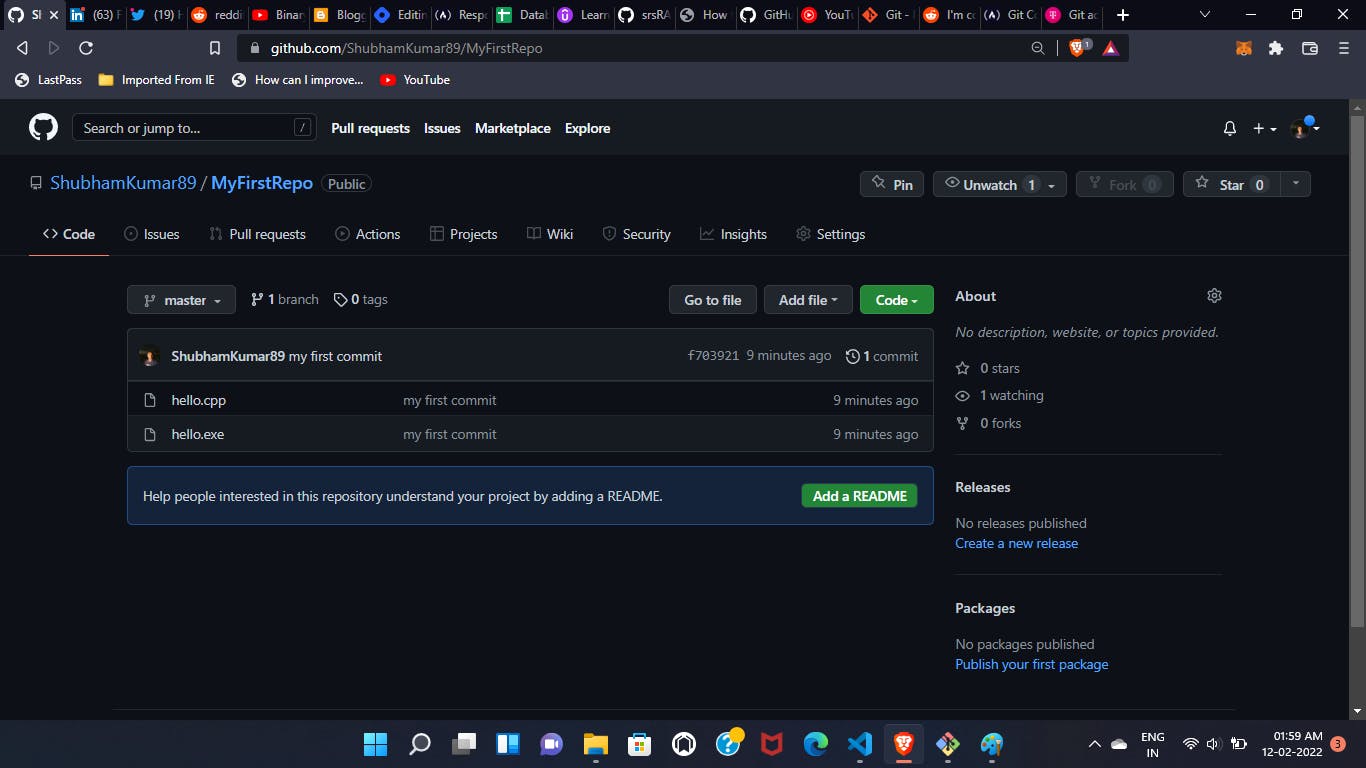
Now you can manually add a Readme file for your repository.
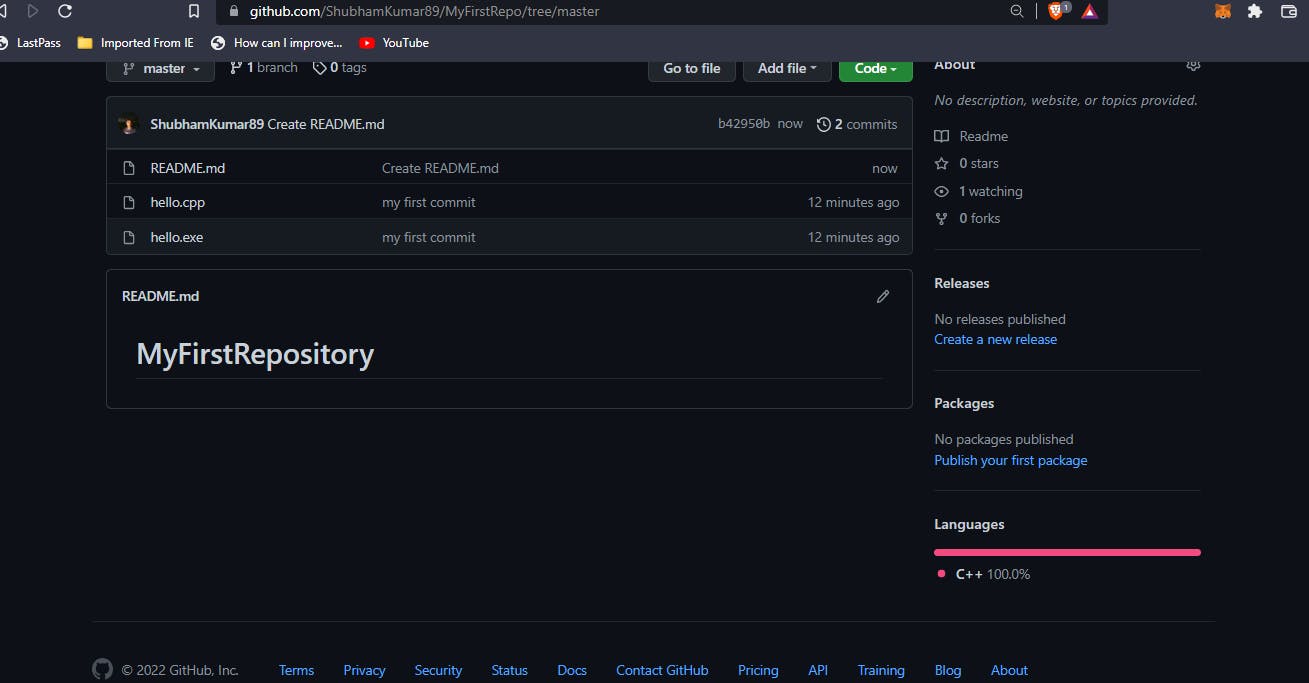 OR
OR
You can use Git command to add a Readme file :
echo "# MyFirstRepo" >> README.md
git add README.md
// .md stands for markdown which is a Plain-text formatting syntax.
Note : You have to run echo "# MyFirstRepo" >> README.md then only this git add README.md command works.
OR
you can use touch command to add a file as follow :
touch README.md
// Add a Readme file, you can manually add the inside text.
As you can see hello.exe file is of no use in my Repo, so you can remove it without deleting the actual file by adding the .gitignore file.
touch .gitignore
// Create a file .gitignore
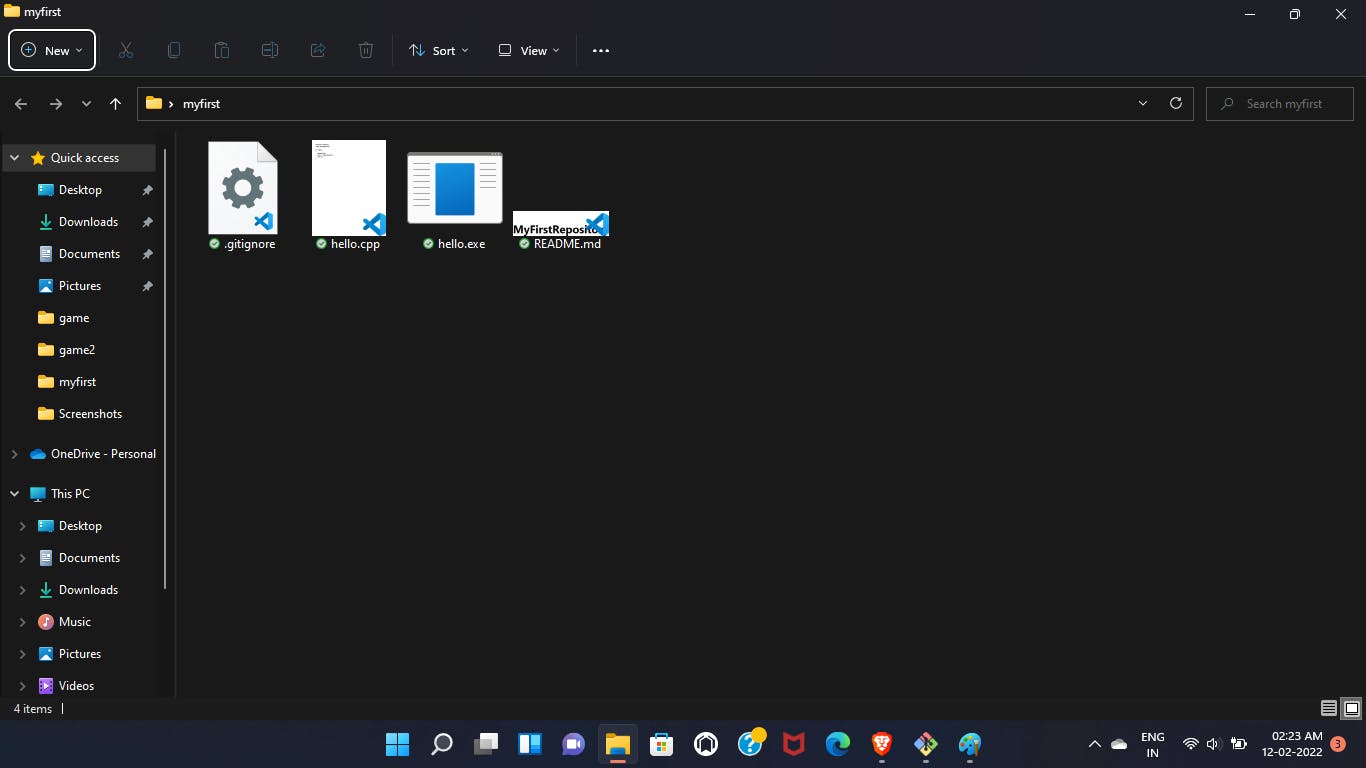 You can add the file name/extension in the .gitignore file that needs to be ignored from your repository.
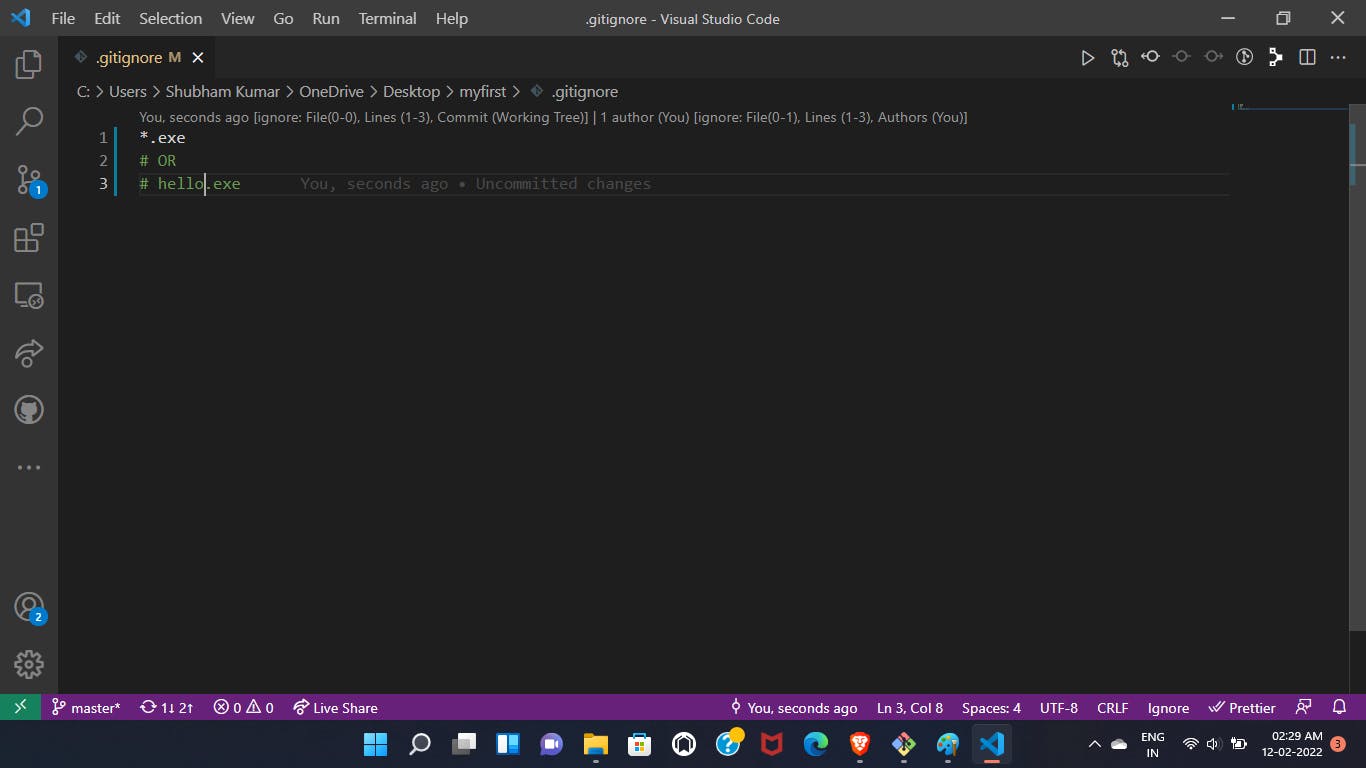 Note : Sometimes .gitignore does not work, like you want to ignore a file that is already push to the repository, Git will not ignore the file if you add a .gitignore file or write the file names inside it, later. In that scenario, you have to untrack the file in the first place by running the following command in your terminal.
git rm --cached <filename>
//Untracked the file
Push the code again in the Github in the same way and you will see that your repo does not have the .exe extension files.
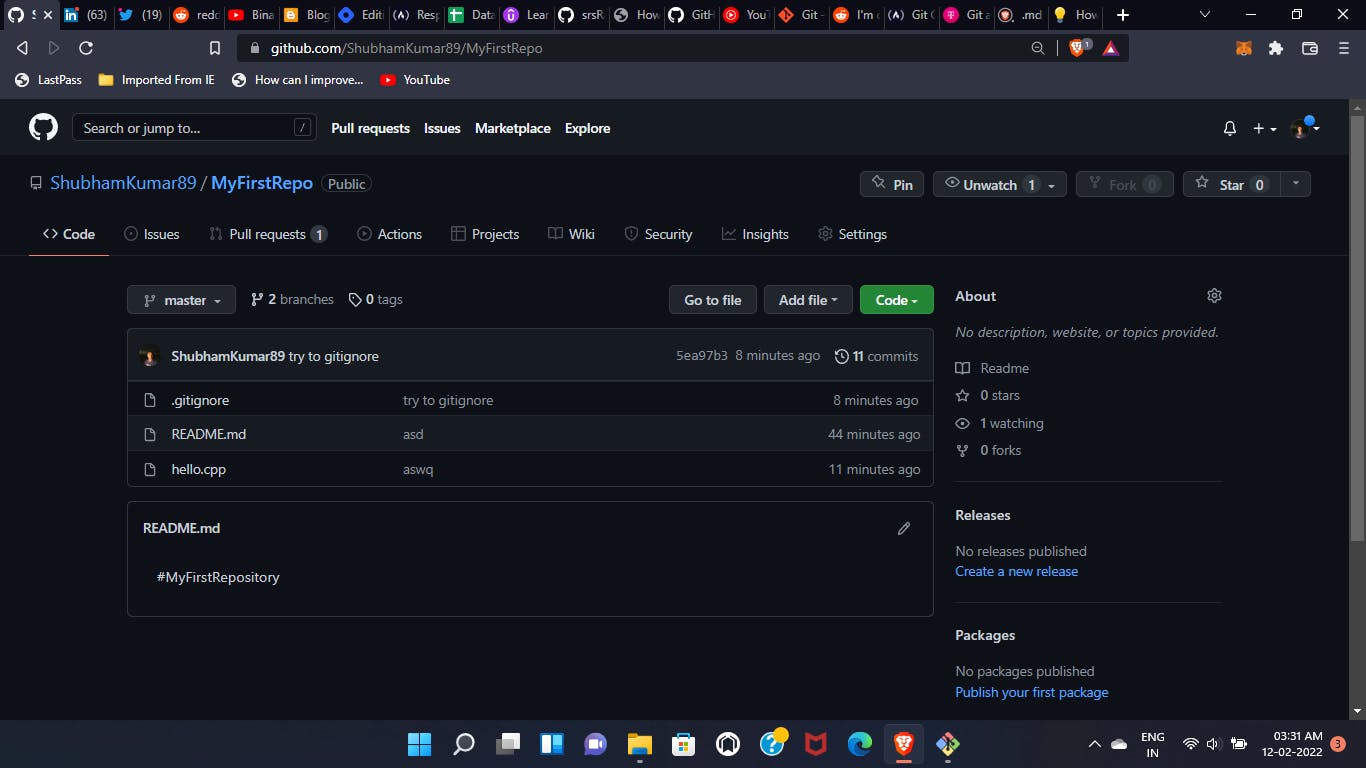
Common Error that comes across while pushing your repository for the first time :

For a Newbie in Github, who are working from the past few days must face this problem a couple of times. You can overcome this error, by running the following commands :git fetch origin master:tmp git rebase tmp git push origin HEAD:master // master branch may be change according to the requirement git branch -D tmpIf more than one account is open in your browser then you can face problems like : Permission denied in your git bash because your git bash is currently associated with another account and finds difficulty in accessing the main account.
- Similarly, if you find more problems/errors while working, you can simply copy the error and paste it on the internet because lot of people face the same problem as you are suffering from and you can definitely find the accurate solution.
Commanly used Git commands :
- Change the Directory
pwd /*show current working directory*/ cd <filename>/ /* change the directory */ cd .. /* to exit from the current directory*/ cd ~ /* change the directory to home directory*/ - Listing the files
ls // list all the files present in the current directory excluding the hidden files ls -a // list out all the files including the hidden ones ls -R // list files in the sub directory as well ls -la // list file names and directories in detail - Remove or Rename
rm <filename>
// to remove the file
mv <old filename> <current filename>
// to rename the file
mv <filename> <location>
// to move the file from one place to another
4. Clear or history
clear
// clear the terminal
history
// shows all the recent commands
git log
// to show all commits
- Construct directory
mkdir <filename>
// to make an empty directory
mkdir <location> <filename>
// to create a directory at a particular location
rmdir <filename>
// to remove a directory
6. Git Frequents
git init
// to initialise a git repo
git status
// to check the current status of your repo
git clone <url>
// to copy the entire project/repo
git remote add origin <url>
/* to connect your repo with the github*/
git add .
///*or*/
git add --a
// to add all the files in staging area
git add <filename>
// to add a particular file in the staging area
touch <filename>
// to create a file
git commit -m "message"
/* to commit a change with a message associated with it*/
git commit -a -m "message"
/* to direct commit the change*/
git rm --cached <filename>
// to untrack the file
rm -rf .git
// to delete the git repository
git checkout -- <filename>
// to restore the previous version of the file
git checkout -f
// to restore the previous version of all the files or to match with the last commit
- These are the basics commands, you can check more commands here.
Used Cases of Git :
- How to contribute :
First, fork the code of whom your want to contribute.
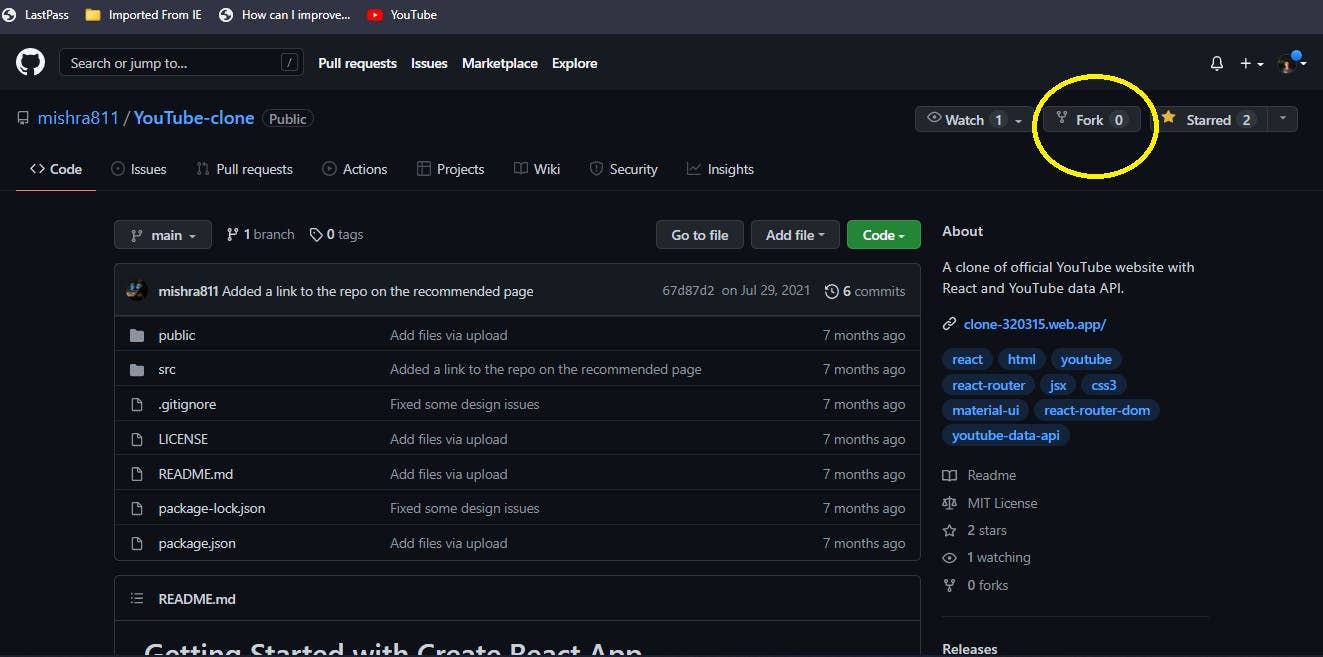
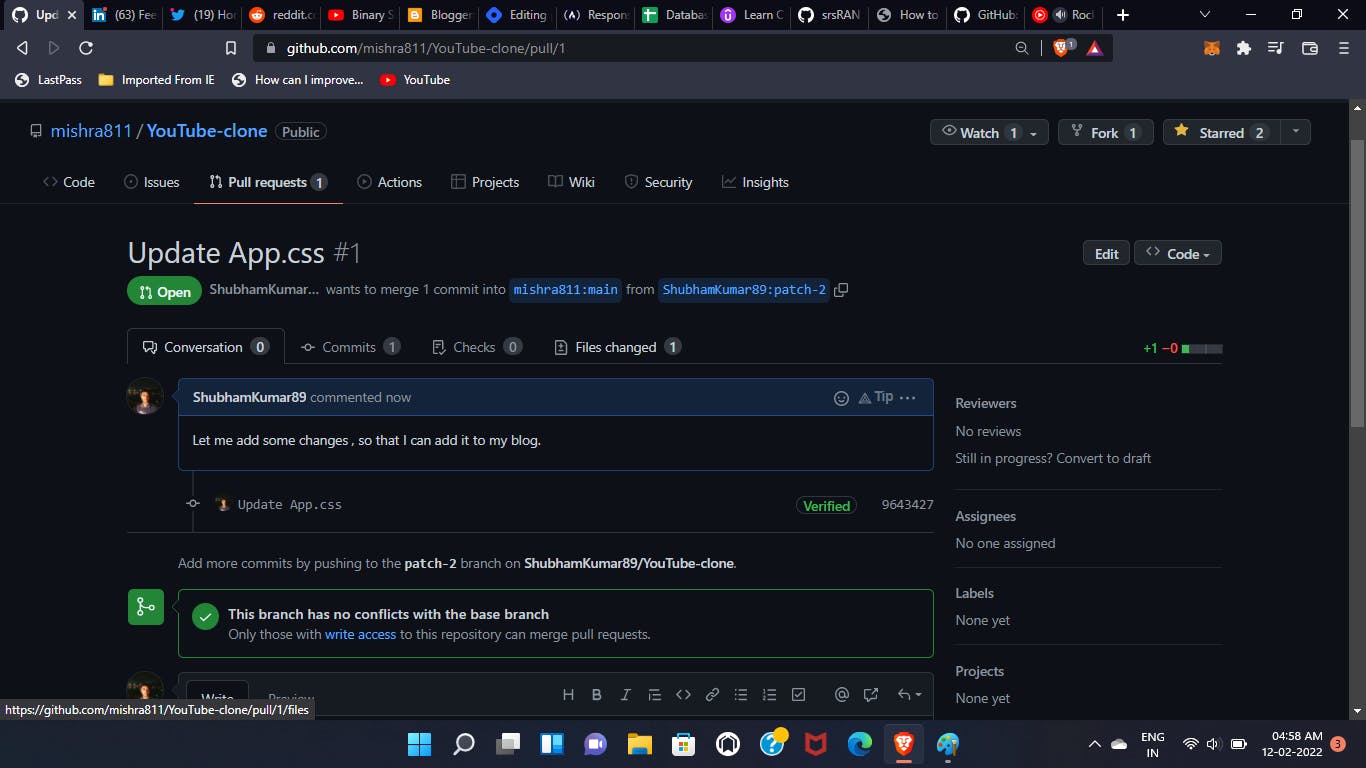
Then, the whole code added to your repository section. Now, you can make necessary changes to the code. And create a pull request to merge the change to the main code. When the owner accept your request, he will merge it with his main source code.
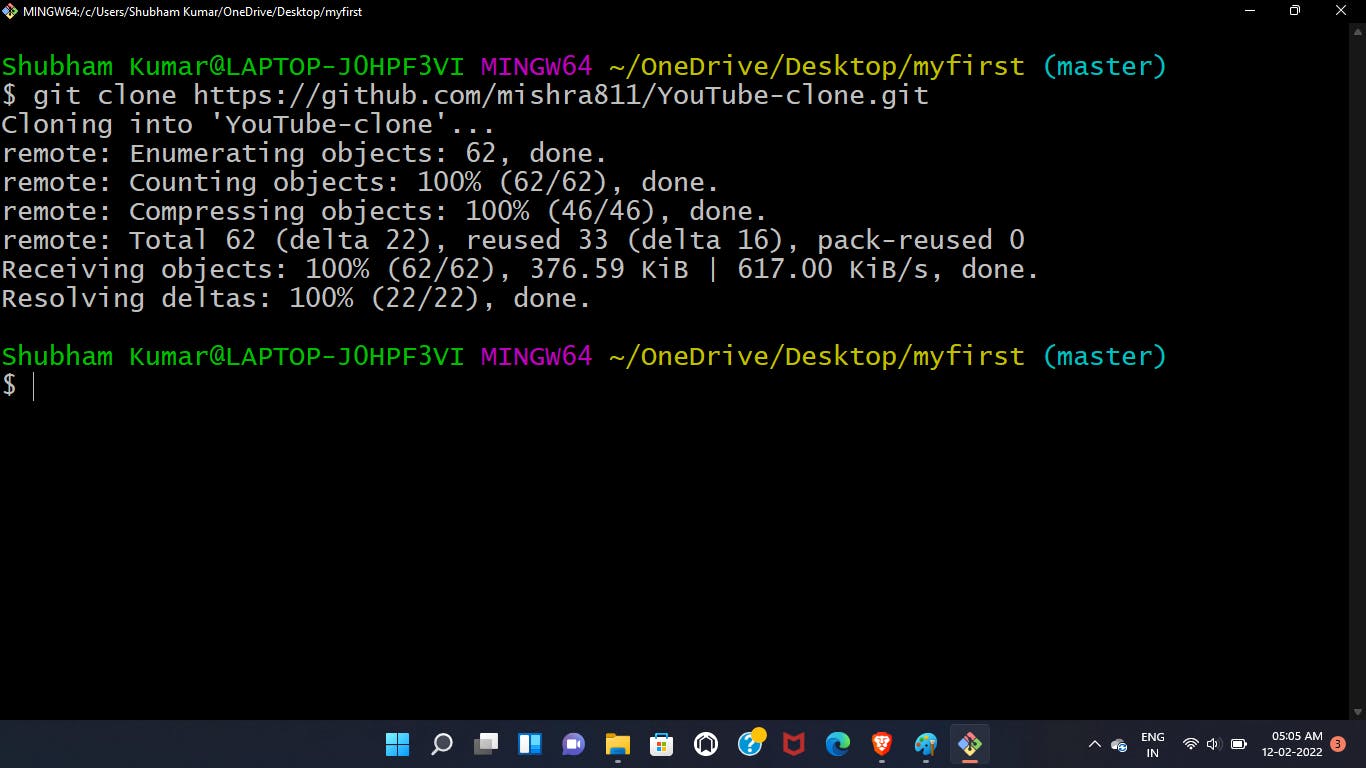
- Clone the Repository :
Copy the HTTPS of the repository that you want to clone.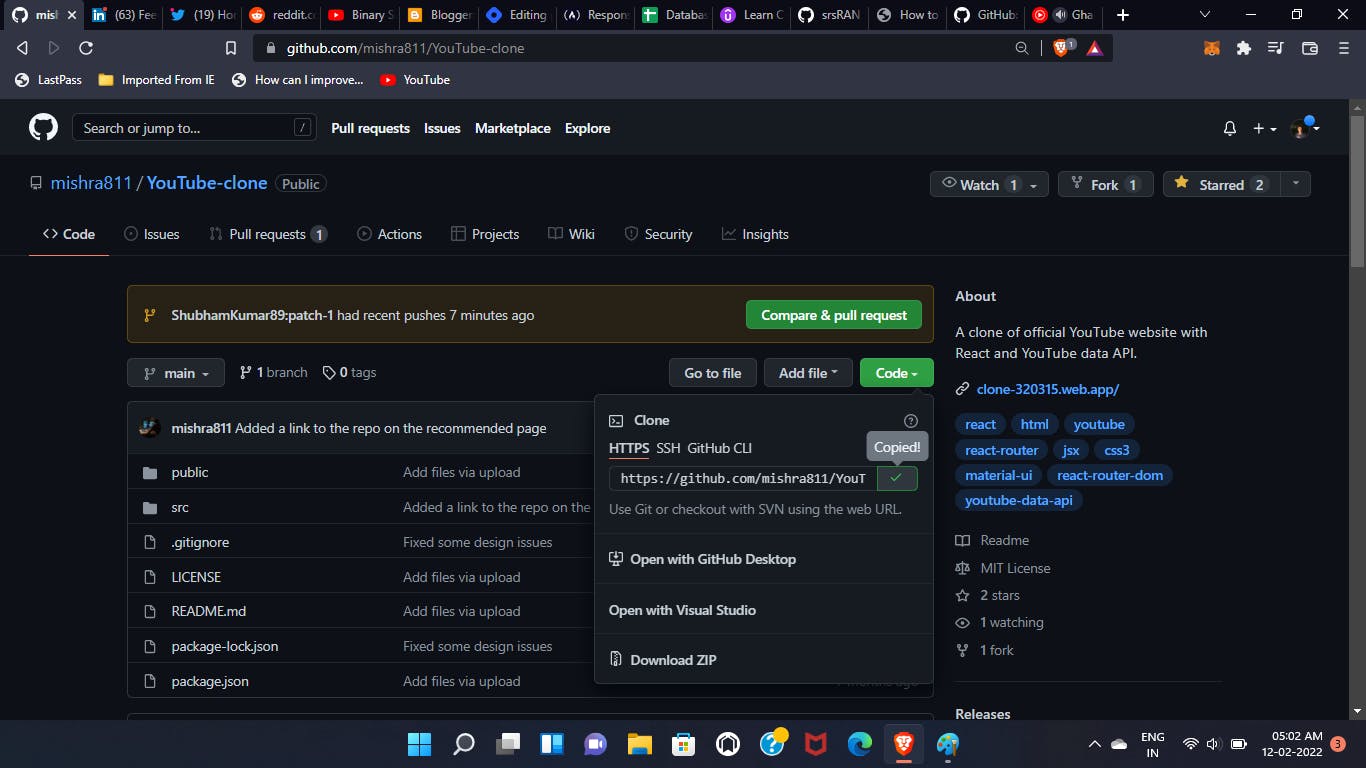 Paste the URL in the git bash with the git clone command as follow :
- Your Contribution :
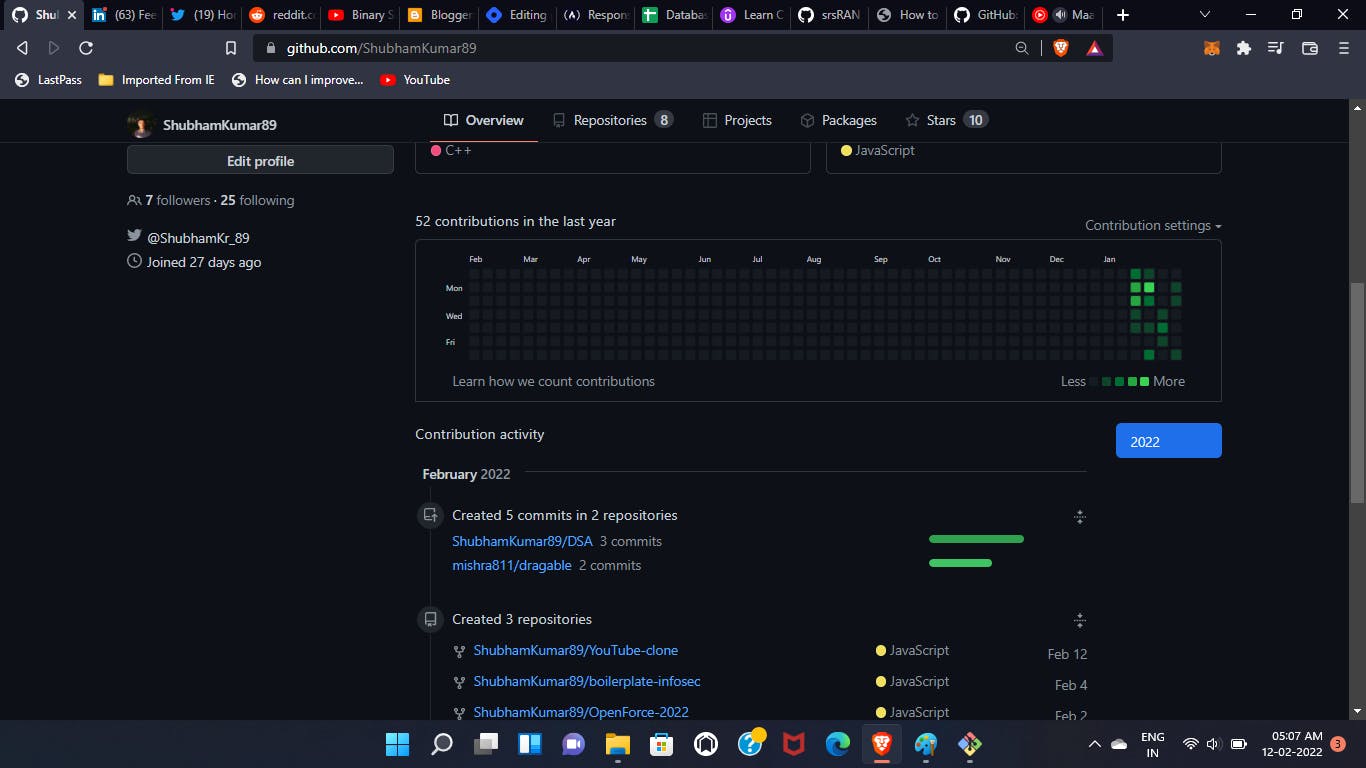
You can see your recent contributions here :
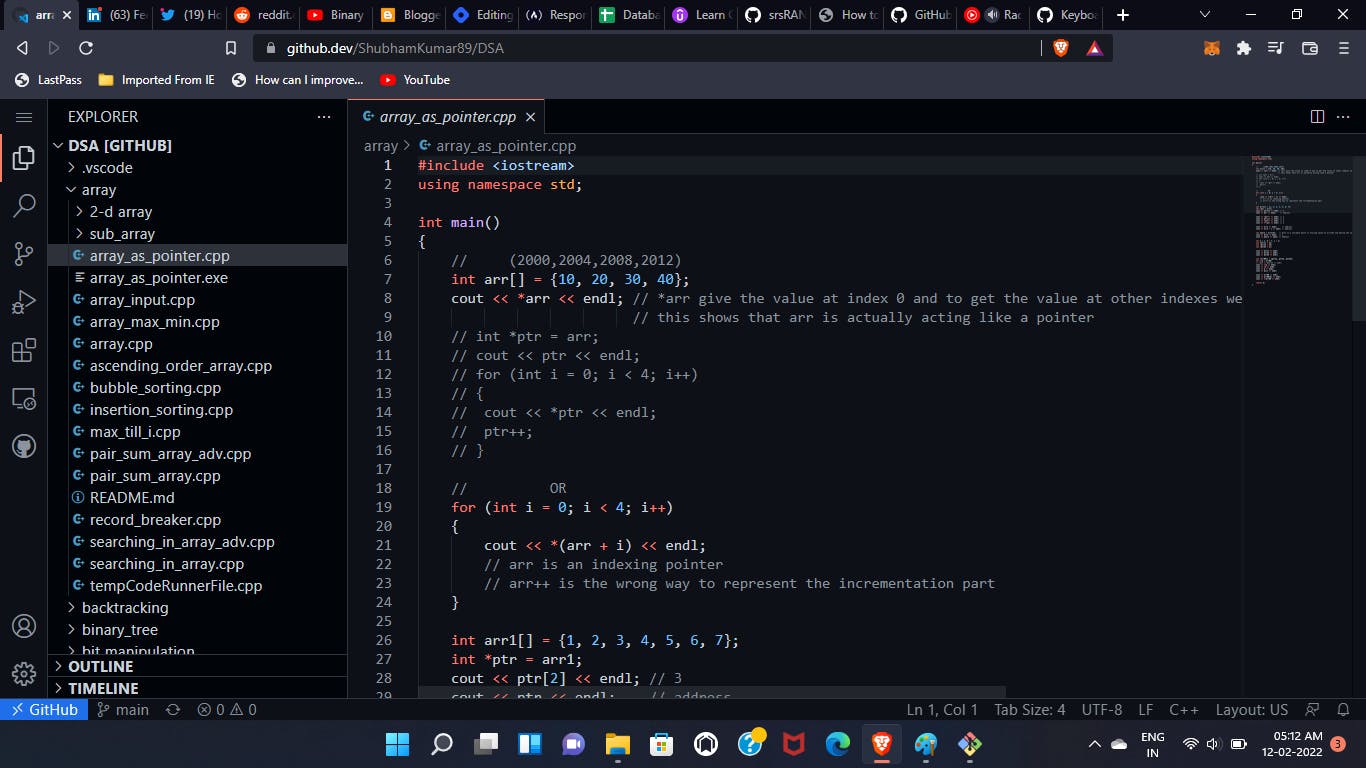
- Open Editor in Github :
You can use Git based editor for any repository by pressing ( . ) dot in the repository.
Know more Github shortcuts from here.
You will learn more when you actually start working in it.
Hope, I am clear to you.
Don't forget to put your thoughts in the comment box.
